How to use the Magic Wand tool in Illustrator?
You are working on a vector project in Illustrator. In it, there are many elements and shapes. You want to select only those with the same color or similar colors. Have you been in this situation before?
So, one of the best features is the Magic Wand tool in Illustrator. It’s an excellent color-based selection tool.
Now, learn how to use the Magic Wand tool in Illustrator.

With the Magic Wand, you can select objects with the same fill color or the same stroke color.
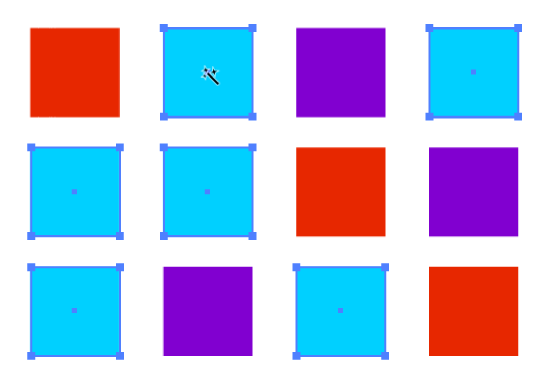
We can also select only objects with the same stroke weight, opacity, and shapes with the same blending mode (Multiply, Overlay, etc.).
If you were already familiar with the Magic Wand tool but only used the basics, you probably didn’t realize all the possibilities, right?
These functionalities can make design projects, illustrations, web, and many others that use Adobe Illustrator much easier.
Would you like to learn about each of the functions of the Magic Wand? Then continue reading below:
How do I find it in the software?
There are a few ways to access the Magic Wand tool in Illustrator. See below:
Accessing the Magic Wand through the Window menu
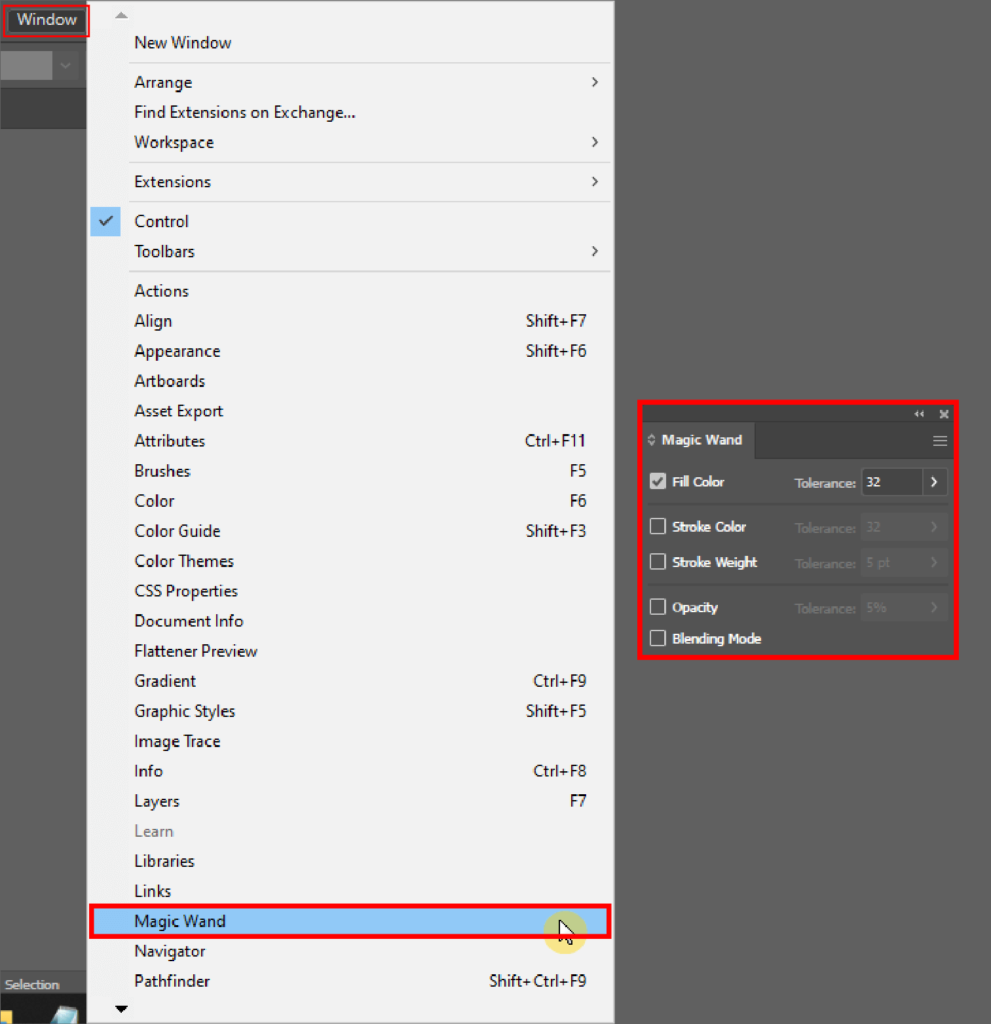
If the Magic Wand icon isn’t showing in the tools on your Illustrator workspace, go to Window > Magic Wand. You can also access it using the shortcut Y.
The tool panel will appear on your workspace.
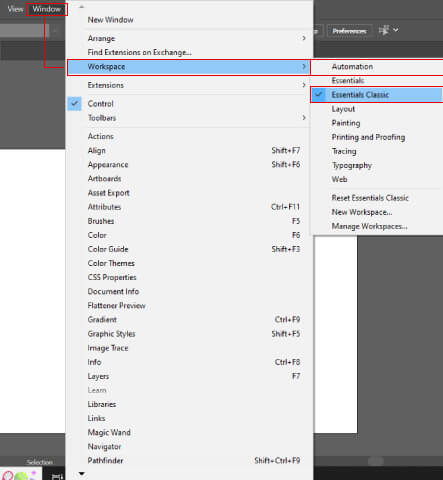
Accessing the Magic Wand by changing the Workspace.
Another way to access the Magic Wand is by altering the display mode of the Workspace.
Perhaps your Workspace is set up in a way that doesn’t include the Magic Wand in the toolbar by default.
So, if you want this function always available in the sidebar, switch to a display mode where it is present.
The display mode of the Workspace affects which tools the toolbar will show.
The Magic Wand has already been integrated into the toolbar in the Automation and Essentials Classic modes. To set up these display modes, go to Window > Workspace and choose one of the two options.
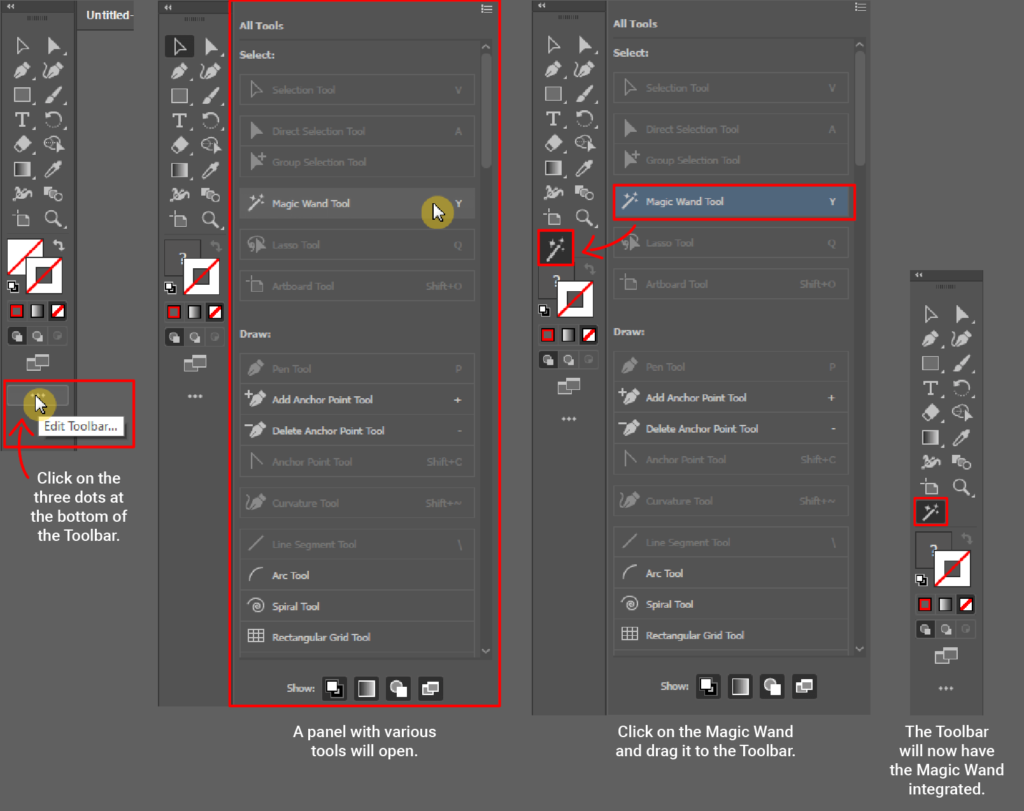
The Magic Wand icon will appear on the Toolbar.

Integrating the Magic Wand into the Toolbar
If the Toolbar doesn’t have the Magic Wand, you can add it, just like many tools available in Adobe Illustrator.
Click on the three dots at the bottom of the Toolbar. This option allows you to customize it.
A panel will open with various Illustrator tools. Look for the option Magic Wand, click on it, and drag it to the Toolbar.
Selecting the Magic Wand based on the Fill Color
The Magic Wand selects various objects based on the fill color.
With this tool, when you click on a blue object, the program will select all others with the same blue color.
Depending on the configuration of the wand, we can select objects with the same blue color and other objects with similar shades of blue.
In image software, a hexadecimal (HEX) system identifies each specific color displayed on the screen.
One type of blue has the hexadecimal code #51BDF4. See below.
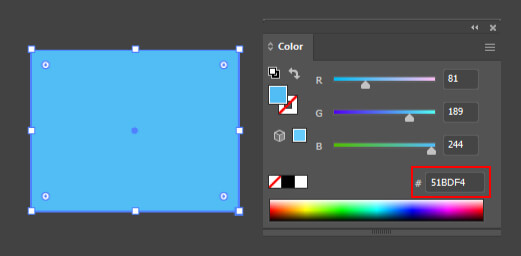
By slightly increasing the Red value in the RGB system, for example, the hexadecimal code changes to #00BDF4, and the type of blue will no longer be the same.
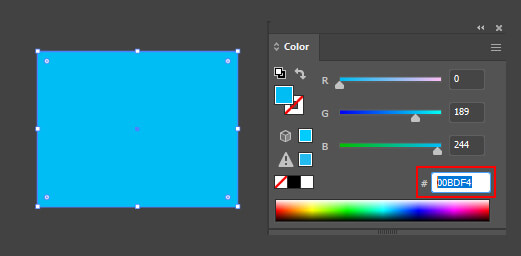
The Magic Wand is used to select objects based on these color variations. To achieve this, we use the tolerance adjustment.
Adjusting the tolerance of the tool to vary fill selections
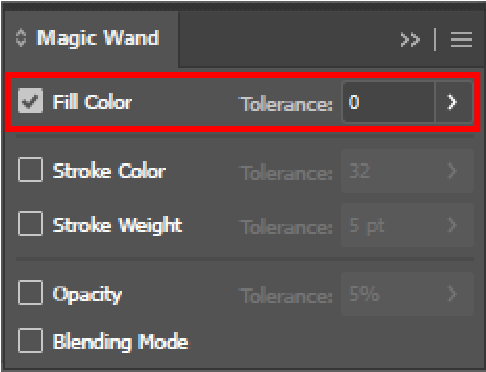
Double-click on the Magic Wand icon. A panel with the tool’s settings will open.
By entering 0 (zero) in the tolerance field under the Fill Color option, you will only select objects with the exact hexadecimal code. In other words, only items that have the exact same color.

As we increase the tolerance, we expand the range of selected colors.
Let’s return to the blue example: When you set the tolerance to 32, the tool will select items with a range of blues close to the blue of the target object.
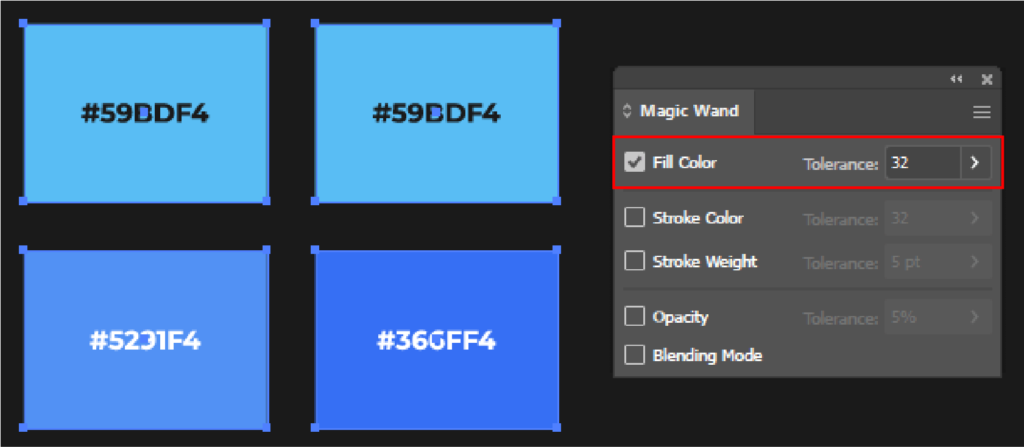
The higher the tolerance, the more this range expands, up to 255. This number covers all colors.
Selecting the magic wand through the stroke color
Another way of selecting the Magic Wand tool is through the stroke color. The tool will select objects with the same stroke color regardless of the fill color.
If the fill color is different, but the stroke color is the same, the tool will select all objects with the same stroke color.
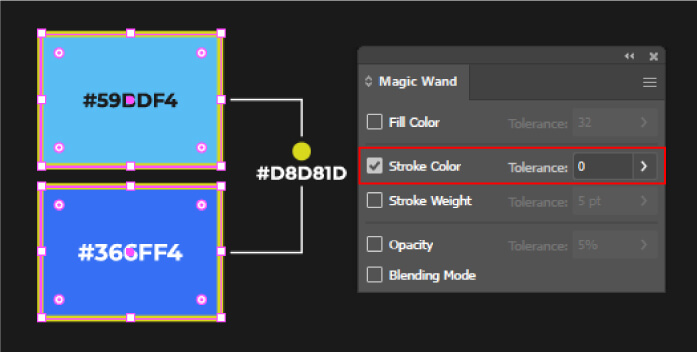
Adjusting the tolerance of the tool to vary stroke color selections
The tolerance in Stroke Color mode follows the same logic as Fill Color.
Tolerance 0 (zero) selects objects with stroke colors having the same hexadecimal code.
As we increase this value, we broaden the range of selected colors, up to the value of 255, which will select all colors in the RGB system.
Selecting the Magic Wand based on Stroke Weight
We can select objects based on their stroke weight.
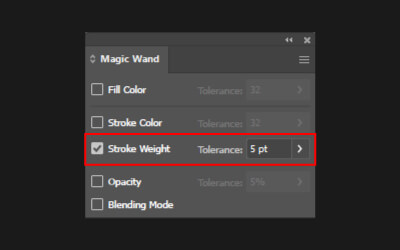
If a shape’s stroke weight is 5pt, the tool will select all objects with strokes of the same thickness.
Adjusting the tool’s tolerance to vary stroke weight selections
The tolerance in the Stroke Weight mode is similar to the others. The difference is that stroke weight, rather than color, is used to make the selection.
A tolerance 0 (zero) selects objects with the same thickness. If a shape has a stroke weight of 5pt, the tool will select all items with the same stroke weight of 5pt.
By increasing the tolerance to 1, the tool will also select objects with stroke weights of 6pt or 4pt if there are shapes with these stroke weights in your work.
For a tolerance of 2 pt, in addition to objects with a 5pt stroke, you will also select objects with (6 pt and 7 pt) or (4 pt and 3 pt) strokes.
As we can see, the tolerance in Stroke Weight mode provides a margin of selection.
The selected objects will be the variation in thickness, either greater or smaller, relative to the tolerance value.
Selecting the magic wand based on opacity
We can select an object based on its opacity.
When you activate the Opacity option in the Magic Wand settings panel, the tool will select all objects with the same opacity.
Adjusting the tool’s tolerance to vary opacity selections
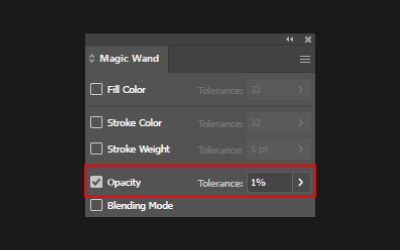
The tolerance for the Opacity option works similarly to the previous ones.
It’s important to note that the number in the tolerance does not represent the opacity percentage, but rather the range or interval of opacities the tool will select. This fact means that when using the Magic Wand tool with the opacity option enabled, it will pick objects whose opacity falls within the range specified by the tolerance.
Example: An object has 5% transparency. When you set a tolerance of 0% for the Opacity option, the tool will select only items with 5% opacity. A tolerance of 0% doesn’t mean selecting objects with 0% opacity. Do you see the difference?
With a tolerance of 1%, the magic wand will select objects with 5% opacity, along with those within a margin of ±1% opacity:
- 5% + 1% = 6%
- 5% – 1% = 4%
Conclusion: With a tolerance of 1%, when selecting objects with 5% opacity, in addition to those, items with 6% and 4% opacity will also be included in the selection if they exist.
This same logic applies as you increase the tolerance. The larger the value, the broader the range of opacities the wand will select.
Selecting the Magic Wand through the Blending Mode
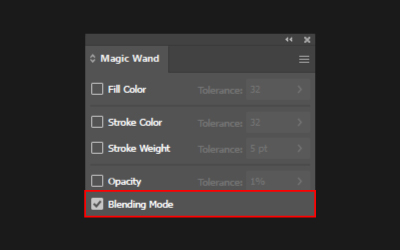
Blending modes are ways of “mixing” that modify how the colors of overlapping objects interact.
There are various types of blending modes, such as Multiply and Overlay. You can access this tool via Window > Transparency or Window > Transparency. Within this panel, there will be a field with different blending modes.
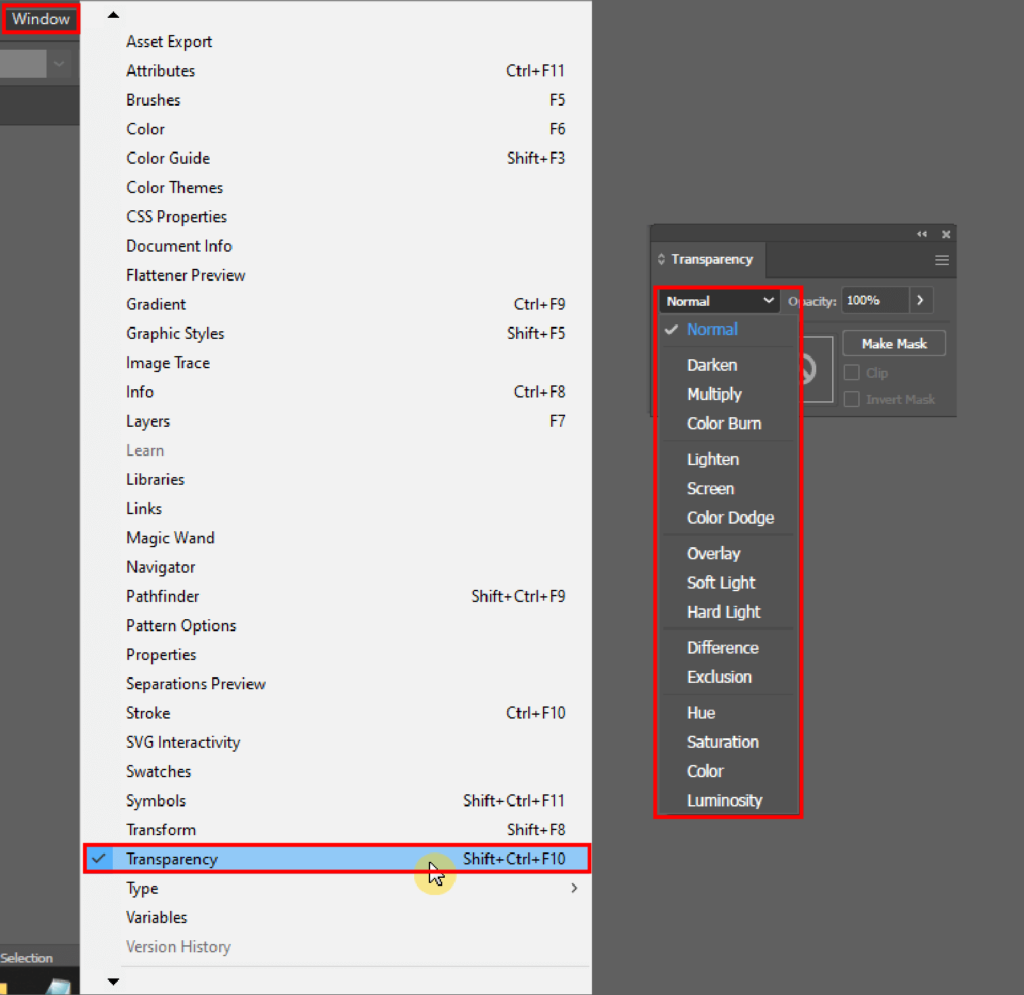
The magic wand is capable of selecting objects with the same blending mode.
Example: If you apply the Multiply mode to a selected object with the wand, the tool will select all other items in your work that are also in Multiply mode.
If you select an object in Overlay mode with the wand, the tool will select all other elements in Overlay mode, and so on.
There is no tolerance for the blending mode option of the magic wand.
It happens because there are no possible variations like in the previous options. The range of selection is limited to the existing blending modes in the program.
Tip: Inverse Selection
If you want to select all colors except for a specific one, use the magic wand to choose that color (using tolerance = 0), and then go to the menu Select > Inverse.
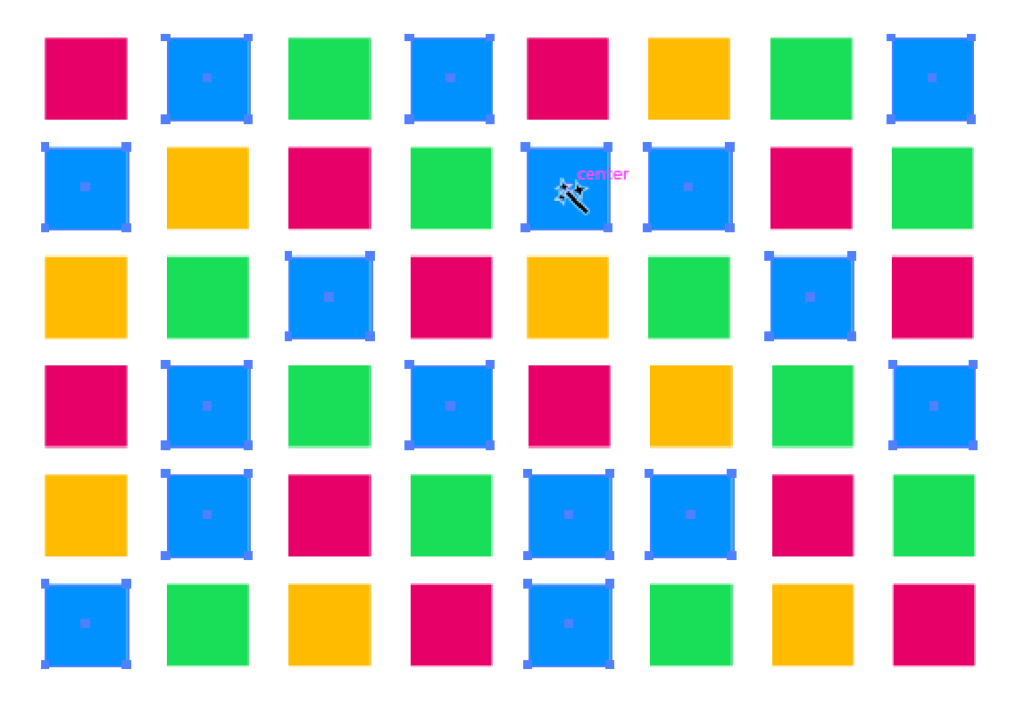
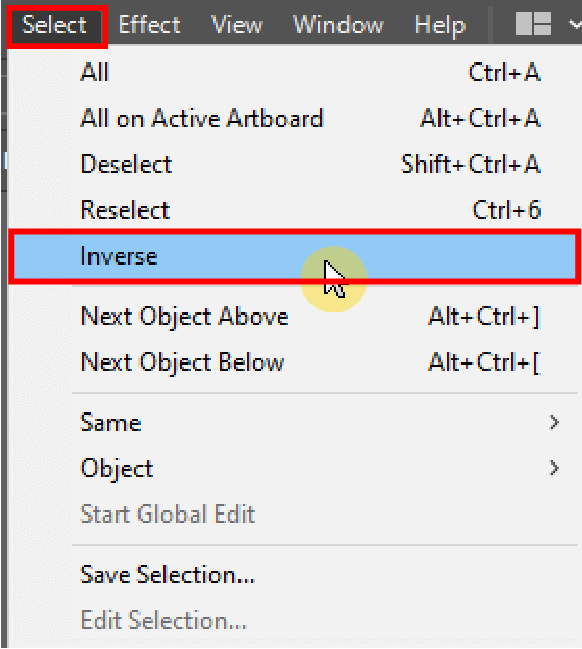
The software will invert the selection. It will select all the colors except the one you want to exclude.
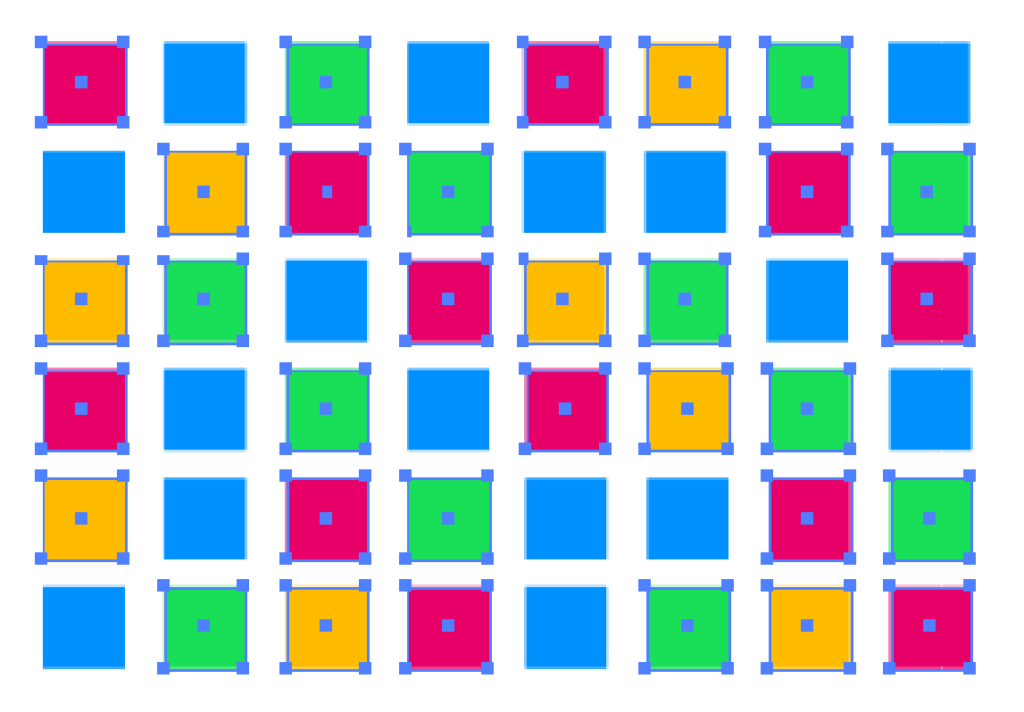
In a composition with many elements, this alternative is quite handy. After all, carrying out this task by hand would be a lot of work.
How does using the Magic Wand tool in Illustrator improve your work?
Magic Wand is a valuable tool. Knowing all the possibilities it offers is essential to make the most of the software. It will certainly greatly facilitate your work.
The creative process goes far beyond knowing computer program tools. However, knowing how to use the available tools correctly will contribute to expanding the possibilities of creation.
So, did you like the article? Could you share it with your friends?

